- EasyCard
- Trade
- Help
- Announcement
- Academy
- SWIFT Code
- Iban Number
- Referral
- Customer Service
- Blog
- Creator
Sending Money with Apple Pay Made Easy


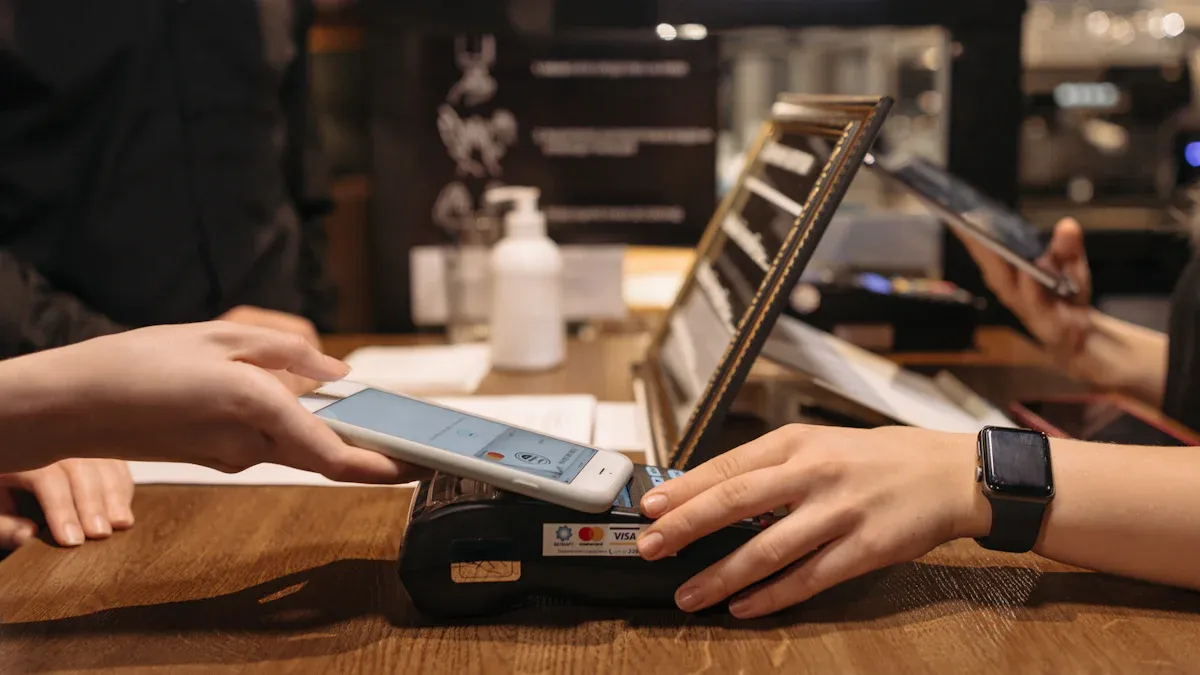
Image Source: pexels
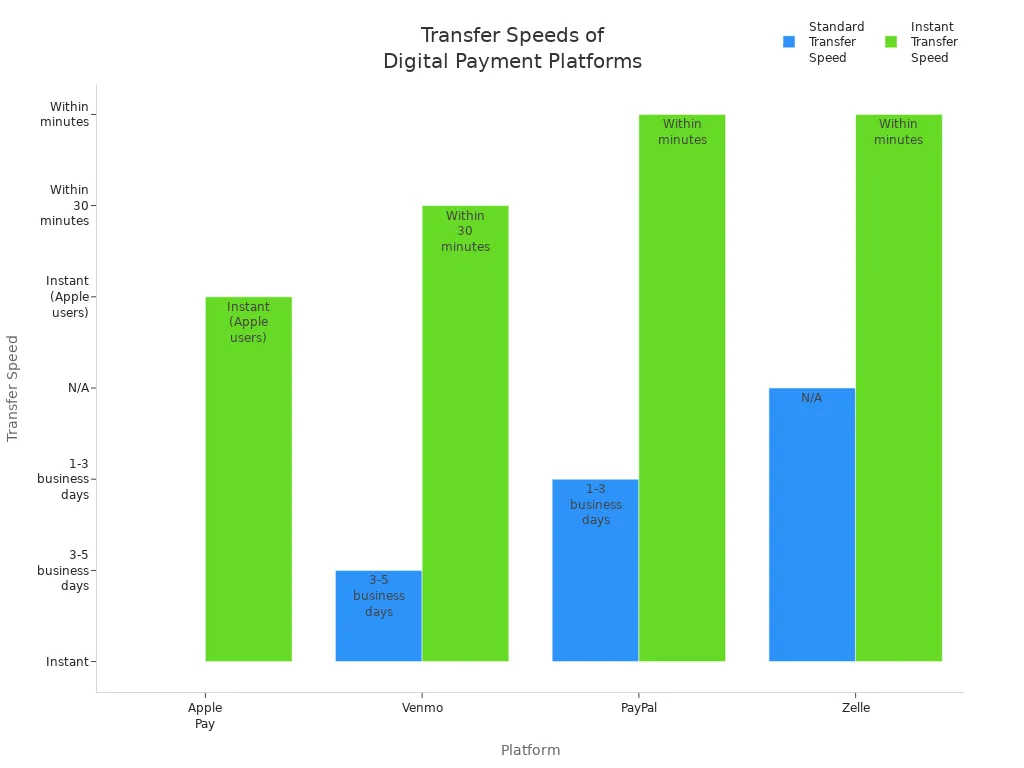
You can send money through Apple Pay in just a few taps. Use the wallet app, Messages app, or Tap to Cash for instant transfers between Apple users. Apple Pay stands out for speed—take a look at how it compares:
To send money through Apple Pay, set up Apple Cash, use a compatible device, and add a payment method. If you wonder how to send money, just follow these simple steps.
Key Takeaways
- Set up Apple Cash and link a payment method on a compatible Apple device to send money quickly and securely with Apple Pay.
- Choose from three easy ways to send money: Wallet app for managing funds, Messages app for chat payments, or Tap to Cash for fast in-person transfers.
- Keep your money safe by using Face ID or Touch ID, enabling two-factor authentication, and only sending money to people you trust.
Requirements for Apple Pay Money Transfer
Before you start an apple pay money transfer, you need to make sure your device and account are ready. Here’s what you need to know:
Device and Software
You need a compatible Apple device and the right software version. Check this table to see if your device works:
| Device Type | Minimum Model / OS Requirement |
|---|---|
| iPhone | iPhone 6 or newer |
| iPad | iPad Air 2 or newer |
| Apple Watch | Series 1 or later |
| Mac | Macs with Touch ID, running macOS Sierra or later |
| Apple Vision Pro | Supported with visionOS versions |
| Operating System | iOS 11.2 or later for Apple Cash; iOS 8.1 or later for Apple Pay |
| Additional Notes | Two-factor authentication and iCloud sign-in required |
Tip: You must be at least 18 years old and live in the United States. Make sure you use the latest software and turn on two-factor authentication for your Apple ID. Sign in to iCloud with the same Apple ID on all your devices.
Apple Cash Setup
You need to set up Apple Cash in the Wallet app before you send or receive money. Both you and the person you send money to must have Apple Cash set up on a compatible device. If you want to use Tap to Cash, both devices must support the Wallet app and run the latest iOS or watchOS.
- Open the Wallet app and follow the prompts to set up Apple Cash.
- You may need to verify your identity. Apple might ask for your name, address, Social Security number, or even a copy of your government ID.
- Apple Cash is only available in the United States.
Add Payment Method
To complete a money transfer, you need to link a payment method to your Wallet app. You can use:
- Apple Card
- Apple Cash
- Most credit and debit cards
- PayPal
- Apple Account balance
Apple protects your information with strong privacy and security measures. Your bank details are encrypted and stored securely in iCloud Keychain.
How to Send Money Through Apple Pay
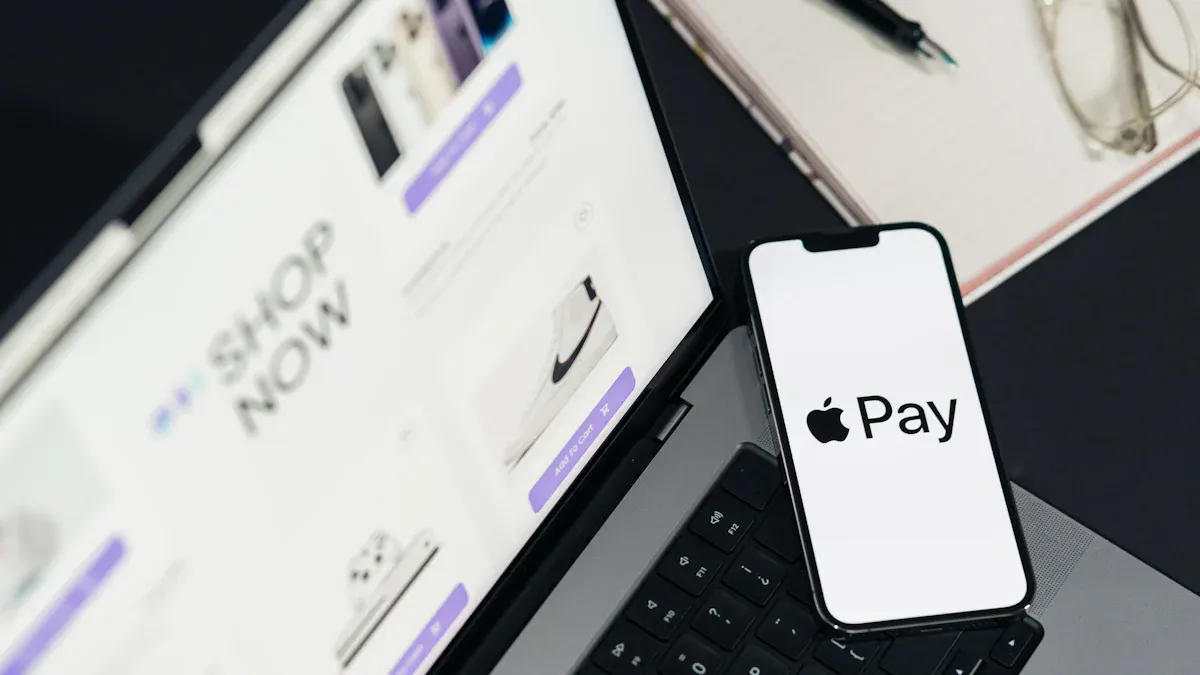
Image Source: pexels
You have several ways to send money through Apple Pay. Each method is fast, secure, and easy to use. Whether you want to send money to a friend, pay for something in person, or split a bill, Apple Pay has you covered. Let’s look at how to send money using the wallet app, the Messages app, and the new Tap to Cash feature.
Send Money in Wallet App
The wallet app gives you a simple way to send money right from your iPhone or iPad. You can move funds between your Apple Cash, Apple Card, or even to a linked bank account. Here’s how to send money through the wallet app:
- Open the wallet app on your device.
- Tap your Apple Cash card.
- Tap the More button (•••), then choose “Send or Request.”
- Enter the amount you want to send.
- Select the recipient from your contacts or enter their details.
- Double-click the side button to confirm.
- Authenticate with Face ID, Touch ID, or your passcode.
You can also transfer money from your Apple Card Savings account to Apple Cash. Just tap Apple Card, select Savings, then tap Withdraw. Enter the amount, pick Apple Cash as the destination, and confirm. Most transfers happen instantly, but sometimes they may take longer if Apple needs to review the transaction.
Note: You must have the latest iOS and a compatible device for all features. Apple Cash services are only available for users 18 or older in the United States.
The wallet app lets you track your apple pay transfers and see your latest transactions. If you want to send money to a bank account, you can choose between an instant transfer (with a small fee) or a standard transfer that takes 1-3 business days.
Send Money in Messages App
If you want to send money while chatting, the Messages app makes it easy. You can send money through apple pay right inside your conversation. Here’s how to send money in Messages:
- Open or start a conversation in the Messages app.
- Tap the Apple Cash button. If you don’t see it, tap the blue “A” icon to open the app drawer.
- Enter the amount you want to send.
- Tap Send.
- Confirm the payment by double-clicking the side button and using Face ID, Touch ID, or your passcode.
You can also request money from someone in the same way. The Messages app uses your Apple Cash balance by default, but you can switch to a linked debit card if you prefer. The money appears in the recipient’s Apple Cash card almost instantly.
Tip: Both you and the person you’re sending money to must have Apple Cash set up and be using Apple devices with the latest software.
Sending money in Messages feels like sending a text. You don’t need to leave the conversation or open another app. This method is perfect for splitting lunch, paying for tickets, or sending a quick gift.
Use Tap to Cash
Tap to Cash is a new feature that makes transferring money in person even easier. With this method, you just hold your iPhone near another iPhone or Apple Watch to send money through apple pay. Here’s how to use Tap to Cash:
- Open the wallet app and select your Apple Cash card.
- Tap “Send or Request,” then choose Tap to Cash.
- Enter the amount you want to send. You can add a note if you like.
- Double-click the side button to confirm and use Face ID, Touch ID, or your passcode.
- Hold your iPhone close to the recipient’s device.
- The recipient gets a notification to accept the payment.
- Once accepted, you both see a confirmation in your wallet app.
Tap to Cash works only with devices running iOS 18 or watchOS 11 or later. Both devices must be nearby and connected to Wi-Fi or cellular data. This feature does not share your phone number or email, so your privacy stays protected. You can send up to $2,000 over seven days, with a minimum of $1 per transaction.
Note: Tap to Cash is available only in the United States for now. It’s great for quick, private payments when you meet someone in person.
Comparing the Methods
| Method | Best For | Speed | Privacy | Device Needed |
|---|---|---|---|---|
| Wallet App | Managing funds, transfers | Near-instant | High | iPhone, iPad |
| Messages App | Chat payments, requests | Near-instant | High | iPhone, iPad, Mac |
| Tap to Cash | In-person payments | Instant | Highest (no info shared) | iPhone, Apple Watch |
All three methods use Apple’s secure system. You confirm each payment with Face ID, Touch ID, or your passcode. You don’t need to worry about your information being shared. Apple Pay money transfer works only between Apple devices, so both you and the recipient must use compatible hardware.
If you want to know how to send money quickly, choose the method that fits your situation. The wallet app is best for managing your balance and sending larger amounts. The Messages app is perfect for sending money during a chat. Tap to Cash is the fastest way to pay someone in person without sharing any personal details.
If you ever wonder how to send money with Apple Pay, just remember: open the wallet app, use Messages, or try Tap to Cash. Each way is simple, safe, and fast.
Apple Pay Money Transfer Steps
Start Payment
Starting a payment with Apple Pay feels simple, but you want to avoid common mistakes. Before you begin, make sure your device settings are correct and your Apple Pay account is ready. Here’s a quick look at issues people often face and how to fix them:
| Common User Errors When Starting Apple Pay Payment | Description / Symptoms | Common Troubleshooting Steps |
|---|---|---|
| Incorrect region settings on device or Apple ID | Errors like ‘Could not set up Apple Pay’; region incompatibility messages | Verify and reset region settings on device and Apple ID; toggle region setting back and forth |
| Lack of device passcode | Wallet app requires passcode; setup fails without it | Enable device passcode |
| Using Apple Pay in unsupported regions or with unsupported banks | Setup errors; inability to add cards | Confirm region supports Apple Pay; check bank/card support |
| Apple ID sign-in issues | Errors during setup; Apple Pay services unavailable messages | Sign out and sign back into Apple ID |
| Adding cards to Apple Watch after iPhone setup | Errors when adding cards to Apple Watch despite cards visible in iPhone Wallet app | Remove and re-pair Apple Watch; check for multiple watches on account |
| Hitting maximum number of cards allowed in Wallet | Error about maximum cards even with fewer than 22 cards | Sign out and back into Apple ID to reset card count |
| Card issuer restrictions | Messages to contact card issuer | Contact bank or credit card company to check for restrictions |
Tip: Always double-check your region and device settings before you try to send money. This helps your apple pay money transfer go smoothly.
Enter Amount
When you want to transfer money, you need to enter the right amount. Apple Pay gives you a few ways to do this, so you can avoid mistakes:
- Use the keypad to type in the exact dollars and cents.
- Tap the plus or minus buttons to adjust the amount step by step.
- The payment does not send right away. In Messages, it appears as an attachment.
- If you change your mind, tap the ‘x’ to remove the payment before sending.
- You get a final chance to review the amount before you confirm.
This process lets you check your transfer before you send money, so you can feel confident about every step.
Confirm and Send
Before you finish, Apple Pay asks you to review all the details. You see the amount, the recipient, and the date. Apple Pay uses security features like Face ID or Touch ID to make sure only you can approve the transfer. After you confirm, you get a message showing the transfer details. This acts as your receipt and proof that you completed the transfer money process. Always check the recipient’s information and the amount before you hit send. Apple Pay’s security steps help keep your money safe and your transfers accurate.
Money Transfer Fees and Limits
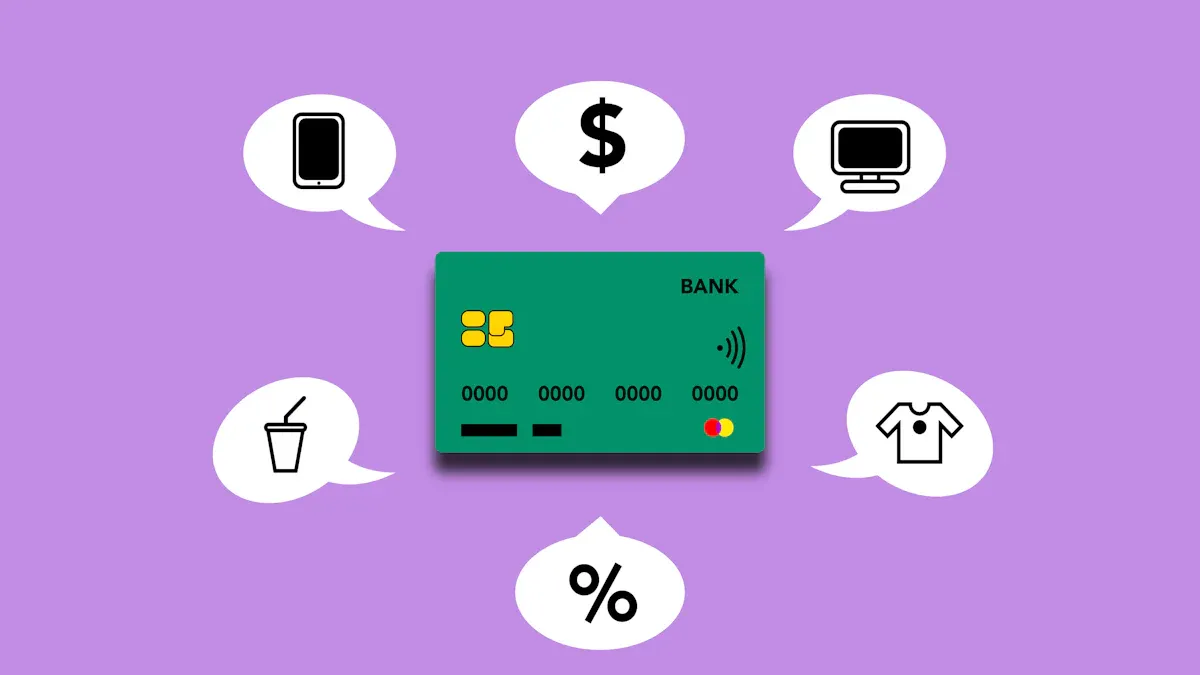
Image Source: pexels
Fees
You do not pay any extra fees when you send money with Apple Pay. Apple does not charge you for using debit or credit cards to make a money transfer. If you use your Apple Card, you also avoid annual, late, or foreign transaction fees. This makes Apple Pay a great choice if you want to save money.
Other apps like Venmo or PayPal often charge about 3% for sending money with a credit card. Some banks may treat these as cash advances, which can lead to high fees and interest rates. With Apple Pay, you skip these extra costs. Always check with your bank or card issuer to see if they add their own fees, especially for credit cards.
Limits
Apple Cash sets clear limits for how much you can send or receive. You can send up to $10,000 in one money transfer or per day. The weekly limit for sending or transferring money to your bank account is $20,000. Apple Pay itself does not set spending limits, but your bank or card issuer might.
| Transaction Type | Limit per Transaction | Daily Limit | Weekly Limit |
|---|---|---|---|
| Sending/Receiving Money (Apple Cash) | $10,000 | $10,000 | $20,000 |
| Transfer to Bank Account | $10,000 | N/A | $20,000 |
Note: Your bank may have its own rules. You can sometimes increase your limits by verifying your identity.
Transfer Times
When you send money to another Apple user, the transfer happens almost instantly. The recipient gets the money right away in their Apple Cash card. If you transfer money from Apple Cash to your bank account, it usually takes 1 to 3 business days. Transfers do not process on weekends or bank holidays. If you do not see your money after three days, you should contact Apple Support.
How to Receive or Request Money
When you use Apple Pay, you can do more than just send money. You can also receive payments or ask someone to pay you. Both options are quick and easy. Let’s walk through each step so you always know what to do.
Accept Payment
If someone sends you money with Apple Pay, you need to accept it before the funds appear in your Apple Cash card. Here’s how you do it:
- Open the Messages app on your iPhone.
- Go to the conversation where you received the payment.
- Tap the “Accept” button and follow the prompts on your screen.
After you accept, the money goes straight to your Apple Cash card in the Wallet app. You can use it right away or transfer it to your bank account. If you have automatic acceptance turned on, Apple Pay adds the money for you, so you do not need to do anything extra.
Tip: Always check your Wallet app after you accept a payment to make sure the money arrived.
Request Money
Sometimes you need to ask someone to pay you back. Apple Pay makes this simple. You can request money right in the Messages app. Just follow these steps:
- Open or start a conversation in Messages.
- Tap the plus icon, then choose Apple Cash.
- Enter the amount you want to request.
- Tap “Request.”
- Tap the Send button to send your payment request.
The person you ask will see your request in their conversation. They can tap to pay you instantly. Make sure you have Apple Cash set up and your device is ready before you request money.
Note: You can only send money or request payments from other Apple users who have Apple Cash set up on their devices.
Troubleshooting Send Money Issues
Eligibility Problems
Sometimes, you might run into problems when transferring money with Apple Pay. Many of these issues come from eligibility rules. Here are some common reasons you may not be able to send money:
- Your device is not compatible. Apple Pay works only on certain iPhones, iPads, and Apple Watches.
- You do not live in the United States. Apple Pay money services are only available in the U.S.
- Your debit card is not eligible for transfers.
- You have not verified your identity. Apple may ask for more information before you can send money.
- Your bank account or routing number is incorrect.
- The billing address does not match the one on your debit card.
- Your device software is out of date.
- Your name has special accents or symbols, which can cause issues.
- Your payment method is expired, blocked, or over the limit.
- Your device region is not set to the United States.
Tip: Always check your device settings and make sure your payment methods are up to date before transferring money.
Device and App Issues
If you meet all the eligibility rules but still have trouble, your device or app may need attention. Try these steps to fix most problems:
- Check your internet connection. Make sure you have a strong Wi-Fi or cellular signal.
- Update your device to the latest iOS or watchOS version.
- Restart your device to clear small glitches.
- Remove and re-add your Apple Cash card in the Wallet app.
- Complete any identity checks if Apple asks.
- Look for restrictions in your device settings for Wallet and Apple Pay.
- Contact your bank to confirm your card is active and not blocked.
- If nothing works, reach out to Apple Support for help.
Note: Always use a secure network when transferring money. Avoid public Wi-Fi to keep your information safe.
Send Money Safely
Security Tips
You want your money to stay safe every time you use Apple Pay. Apple Pay uses strong security features that protect your information and keep your transfers private. Take a look at how Apple Pay keeps your money secure:
| Security Feature | Description |
|---|---|
| Encryption of card information | Apple encrypts your card data and sends it securely, so no one can intercept it. |
| Device Account Number in Secure Element | Your device stores a special number in a secure chip, not your real card number. |
| Biometric and Passcode Authentication | You must use Face ID, Touch ID, or a passcode to approve payments. |
| Two-Factor Authentication for Apple Cash | Apple requires 2FA on your iCloud account for extra protection. |
| Cryptographic Payment Signatures | Each transaction uses unique codes to stop hackers from copying your payment. |
| Remote Suspension and Removal | If you lose your device, you can suspend Apple Pay or remove cards using Find My. |
| Identity Verification | Apple may ask for your ID to prevent fraud and keep your account safe. |
Apple Pay stands out because it never shares your real card number with stores. Your payment details stay private, even if a merchant’s system gets hacked. You get more protection than with most physical cards or other digital wallets.
Tip: Always keep your device updated and use strong passcodes or biometrics. This helps block anyone from using your Apple Pay if your device is lost.
Avoiding Scams
Scammers try new tricks every day, but you can stay ahead by following a few simple steps:
- Only send money to people you know and trust. Treat Apple Pay like cash.
- Double-check payment requests. If someone claims to be a friend or family member, verify their identity.
- Never share your two-factor authentication codes or passwords with anyone.
- Avoid clicking on links in texts or emails that ask for money or personal details.
- Use credit cards with Apple Pay for better fraud protection. Credit cards make it easier to dispute charges.
- Do not accept or send money to strangers, even if they say it is an emergency.
- Watch out for overpayment scams. If someone sends you extra money and asks for a refund, contact Apple Support instead of sending money back.
- Change your Apple Pay settings to require manual approval for payments.
- Avoid using Apple Pay on public Wi-Fi. If you must, use a VPN to protect your data.
If you ever get a payment by mistake, ask the sender to cancel it. Never send money back directly. Remember, Apple will never call you to ask for payments or your login details. Stay alert, and you can enjoy safe, worry-free transfers every time.
Apple Pay gives you speed, convenience, and strong security. Before you send money, always check these steps:
- Share your Apple ID or phone number with the sender.
- Let them know your payment preferences.
- Make sure both of you have the right Apple Pay settings.
Explore all Apple Pay features for easier money management:
- Store cards in your Wallet for quick payments.
- Use Face ID or Touch ID for secure approval.
- Pay with your iPhone or Apple Watch in stores and online.
- Split bills or pay friends with Apple Cash.
You can enjoy simple, safe digital payments every day.
FAQ
Can you send money with Apple Pay to someone who uses Android?
No, you cannot. Apple Pay only works between Apple devices. The recipient must have Apple Cash set up on their iPhone, iPad, or Apple Watch.
What happens if you send money to the wrong person?
You should ask the recipient to return the money. Apple cannot reverse payments. Always double-check the contact before you send money.
Are there any fees for instant transfers to a bank account?
Yes, instant transfers to a bank account cost 1.5% of the amount, with a minimum fee of $0.25 and a maximum of $15. Standard transfers are free.
When sending money with Apple Pay, cross-border payment needs may require efficient currency conversion support. BiyaPay offers an ideal complementary solution with real-time exchange rate queries and conversions, supporting over 30 fiat currencies and 200+ digital currencies, remittance fees as low as 0.5%, and coverage across over 200 countries and regions with same-day remittance delivery. Its quick registration, no-overseas-account-needed US/HK stock investment features, and the launched Easy Card service (enabling easy global payments) add flexibility to your payment needs. Experience these benefits now to optimize your Apple Pay money management! Whether sending domestically or internationally, BiyaPay enhances your transaction efficiency.
*This article is provided for general information purposes and does not constitute legal, tax or other professional advice from BiyaPay or its subsidiaries and its affiliates, and it is not intended as a substitute for obtaining advice from a financial advisor or any other professional.
We make no representations, warranties or warranties, express or implied, as to the accuracy, completeness or timeliness of the contents of this publication.


Contact Us
Company and Team
BiyaPay Products
Customer Services


is a broker-dealer registered with the U.S. Securities and Exchange Commission (SEC) (No.: 802-127417), member of the Financial Industry Regulatory Authority (FINRA) (CRD: 325027), member of the Securities Investor Protection Corporation (SIPC), and regulated by FINRA and SEC.
registered with the US Financial Crimes Enforcement Network (FinCEN), as a Money Services Business (MSB), registration number: 31000218637349, and regulated by FinCEN.
registered as Financial Service Provider (FSP number: FSP1007221) in New Zealand, and is a member of the Financial Dispute Resolution Scheme, a New Zealand independent dispute resolution service provider.